
Agile CRM
Agile CRM is a customer relationship management (CRM) platform that helps businesses manage and improve their interactions with customers. It offers tools for tracking and organizing customer data, managing sales pipelines, automating marketing tasks, and providing customer support. Features of Agile CRM include contact management, email marketing, task automation, lead scoring, and reporting. Additionally, it allows integration with various third-party applications, such as social media, email services, and other business tools, to optimize workflows. Agile CRM is particularly useful for small to medium-sized businesses looking to manage customer relationships, increase sales, and improve customer retention through efficient and automated processes.
Setup
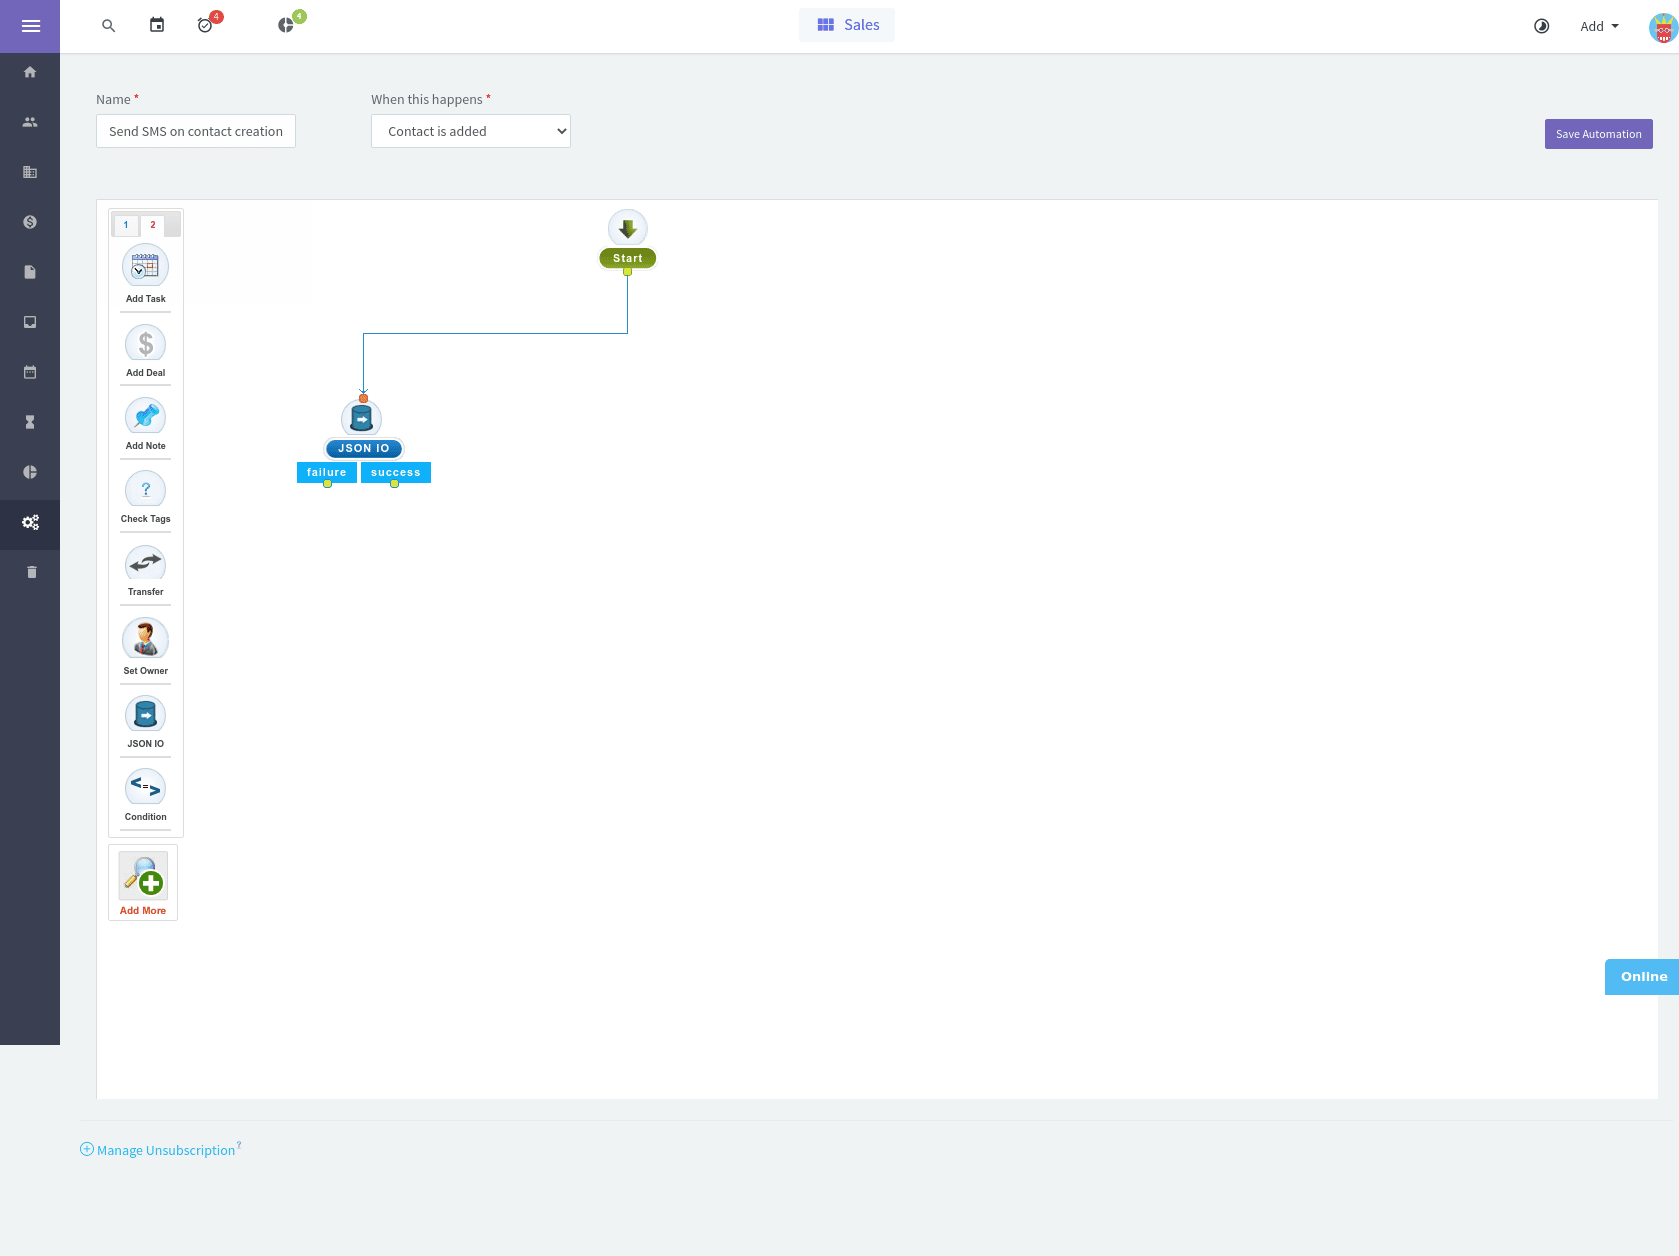
Agile CRM offers great flexibility through its marketing automation tool. In this document, we briefly explain how to send an SMS when a contact is created. The workflow can be adapted with minor adjustments to meet most requirements.
Open your Agile CRM management window and click on Automations. If the navigation panel is collapsed, it is marked with the gear icon.
Select the event of your choice. We focus on the Contact Added event, which is triggered every time a contact is created.
Press Go and click on JSON IO on the second page of actions in the action area on the left side.
- 1
Request URL
We need to set the URL for secure communication with the seven API. Set the URL to https://gateway.seven.io/api/sms.
- 2
Request method
Setting the method type defines the request method. Make sure that it is set to Post.
- 3
Request parameters
We need to add the two required parameters that are needed for the API request.
Message content
Set the key to text.
Set the value to New contact with email {{email}\ was created.
Do you see the part *{{email}*? It will be replaced by the contact's email if set. This is made possible by Mustache-Templates and offers many possibilities.
Message recipient
Set the key to to. Set the value to the recipient number that should receive the SMS, e.g. +49179876543210,+491716992343.
Request headers
We need to add some headers for the communication with the API to be successful.
Accept
This header defines that we want to receive a JSON response. Set the key to Accept. Set the value to application/json.
Content-Type
This header defines that our payload is of type JSON. Set the key to Content-Type. Set the value to application/json.
X-Api-Key
This header ensures that we are allowed to use the API. Set the key to X-Api-Key. Set the value to YOUR_API_KEY, which your can find in your developer dashboard, e.g. aBc129518JGewgghrwGWg42GEWmg4h4H4mERgeOekke.

We have set up the JSON IO action. Click on Save and use drag & drop to connect the Start node to the JSON IO node we just created.
Testing
After we have set up our request, we make sure that it actually works. Open the Test tab and click on the link. An output similar to the following should appear.
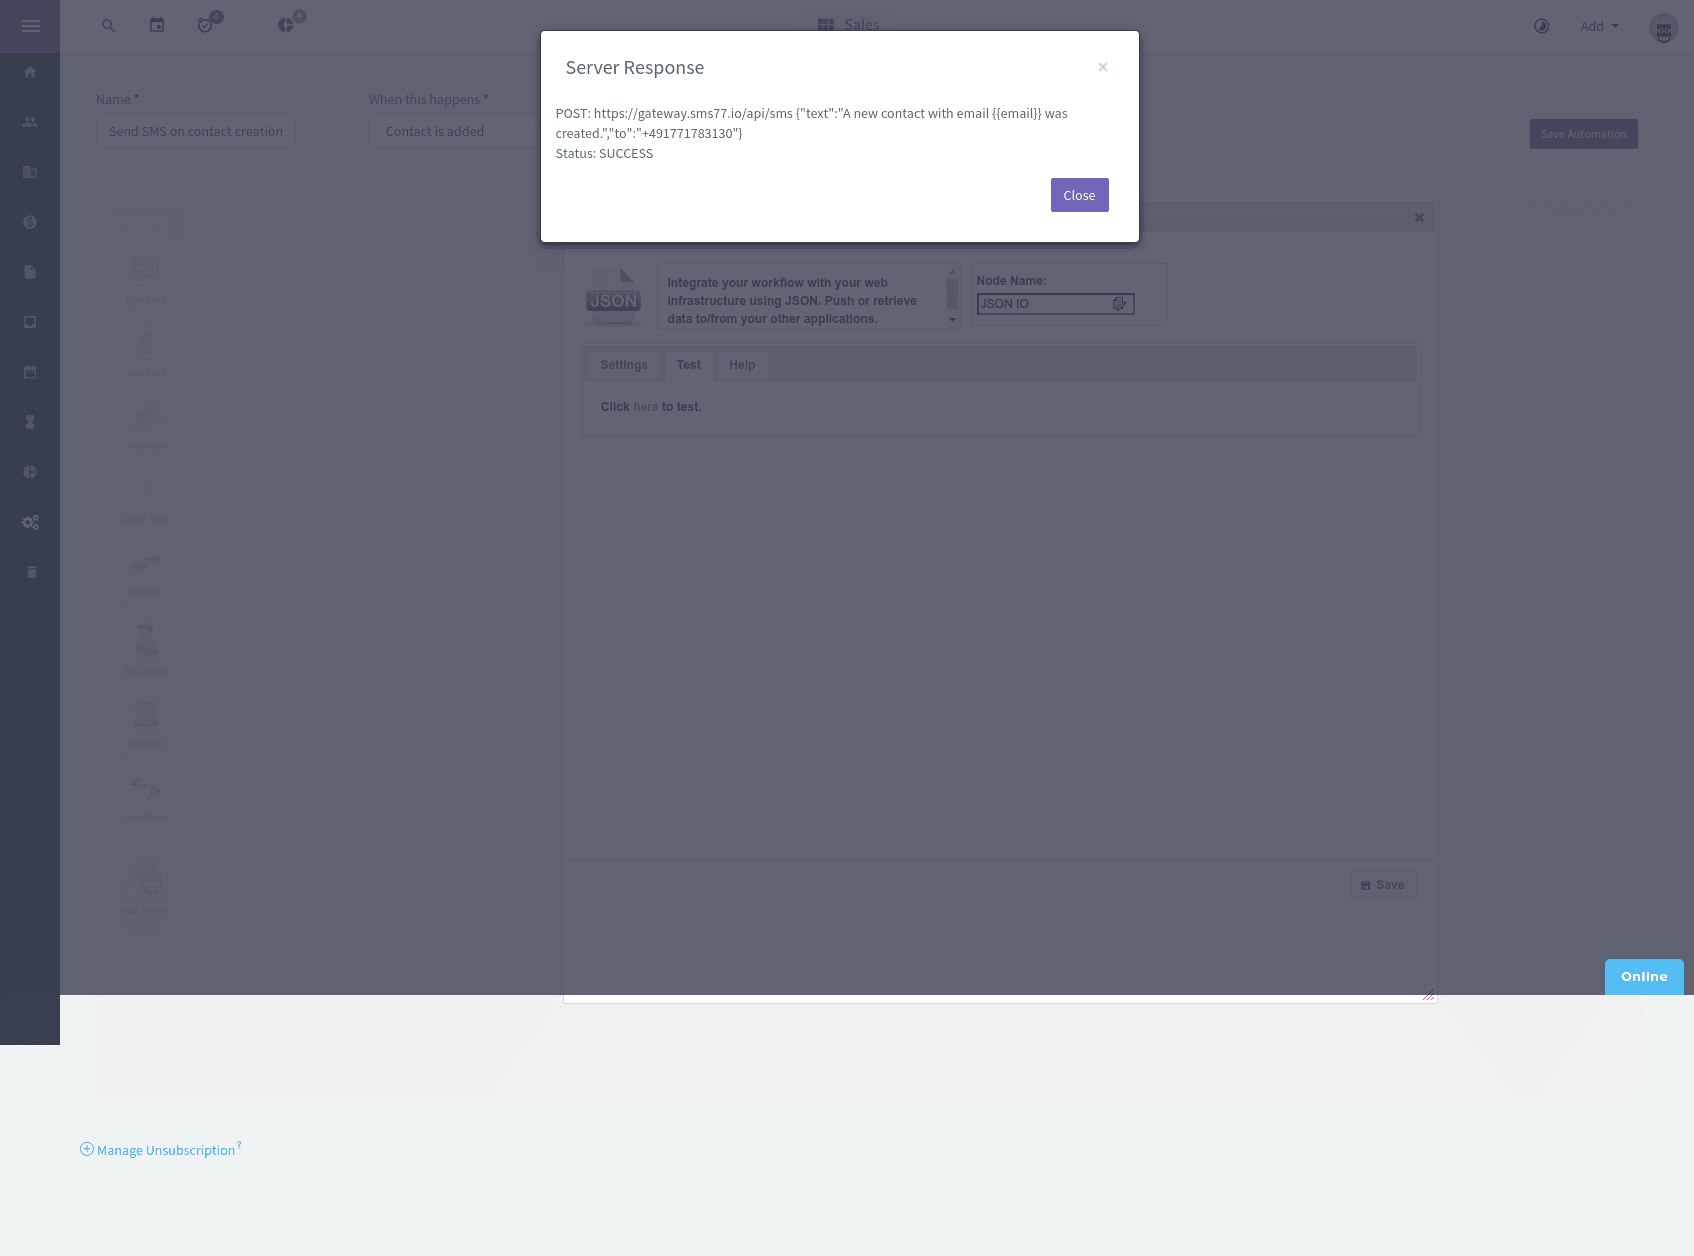
Now you are ready. Every time a new contact is added, the number defined in the to parameter will receive an SMS.